Creating Work Orders
Create a Work Order
Quick Steps to Creating a Work Order
- From the Dashboard or from the left navigation menu go to the Assets Tile.
- Perform a search to view the assets to schedule the work for.
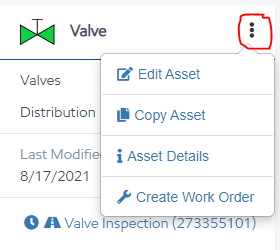
- Select the icon to Create a Work Order.
- Complete the Create Work Orders fields.
- Select Create.
- The Workflow must be associated with the asset class and marked as allowed for work order to create a work order for it.
OR
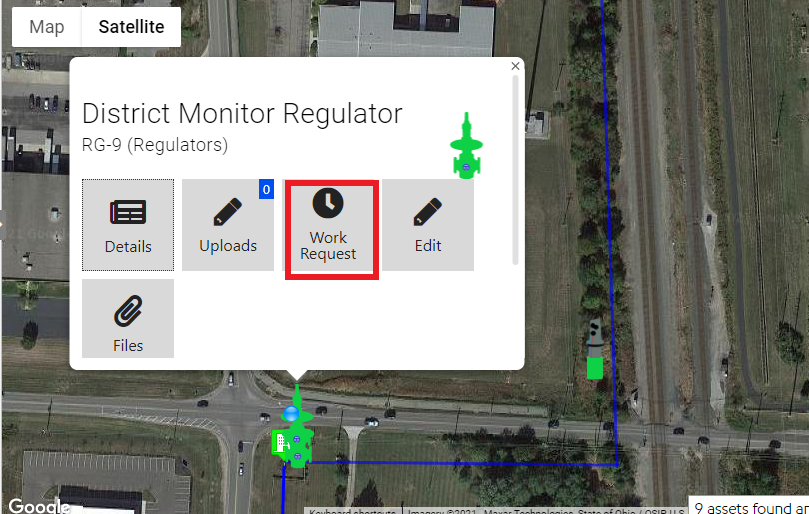
- From the Map - locate the asset.
- Select the asset to bring up Create Work Order button.
- Complete the Create Work Order fields.
- Select Create.
- The Workflow must be associated with the asset class and marked as allowed for work order to create a work order for it.
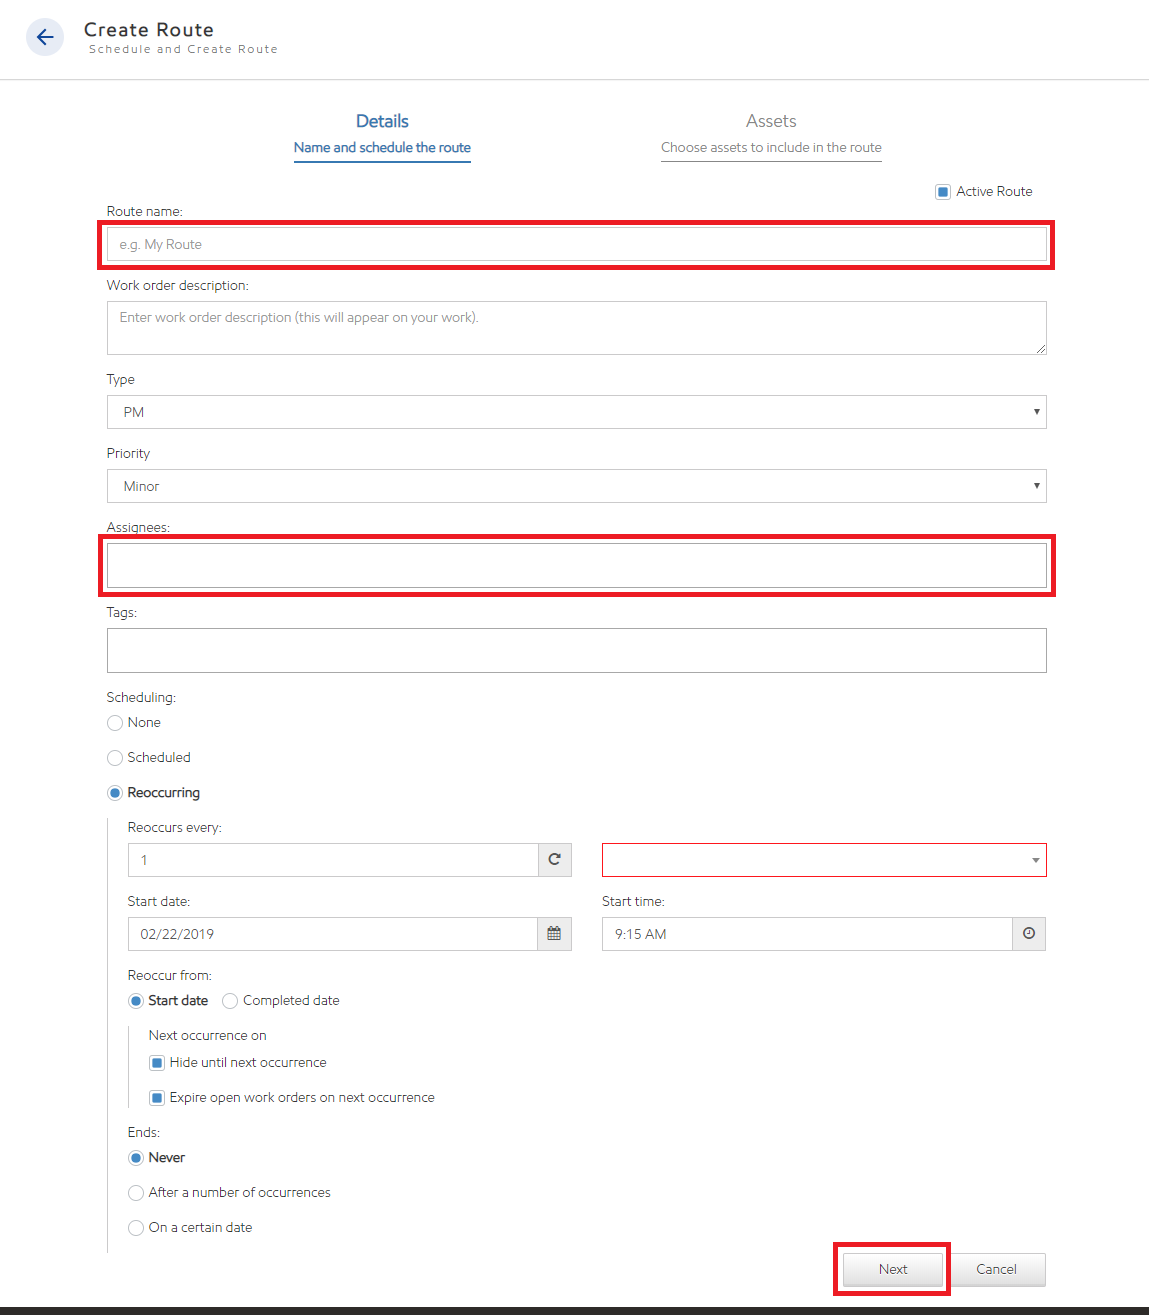
Schedule
- Route Name: The user must input a route name in order to create the route. Route names are not specific and can be repeated. This is a required field.
- Work Order Description: The user can enter a description of the route that will appear on Work Orders.
- Type: Select the type of work is being done by the Route. ( PM, Repair, Investigation, etc...) This is displayed on the work order.
- Priority: Select a priority for the route. (Minor, Major, Critical, etc...) This priority is displayed on the work order.
- Tags: Tags can be added to a route by typing two or more letters into the Tags. Multiple tags can be added to a Route. These tags are applied to every work order and show up in the Work Orders Tile.
- Scheduling:
- None: Work Orders show up as due immediately.
- Scheduled: Work Orders are created and marked as “Open” until the “Start” time has passed. After that time it is considered “Due”. Work Orders can be edited to be due at any time in the future or on the same day.
- Reoccurring
- Reoccurs Every: The number of hours, days, weeks, months, and years to increment
- Interval: Hours, Days, Weeks, Months, or Years to increment
- Start Date: The date the first set of work orders will be scheduled for this route. A Route can be scheduled to start prior to the current date only if the start date is within the scheduling interval. For example: If the scheduling interval is set to Months then the Start Date of the Route must be within a month of the current date. If the scheduling interval is set to Years then the Start Date of the Route must be within a year.
- Expire open work orders on the next occurrence cannot be selected when scheduling a start date prior to the current date.
- Start Time: The time the first set of work orders will be created for this route. It is recommended that the time be set to 5:00 AM so the work appears on the field workers list in the morning.
- Reoccur from: NOTE: The 'Reoccur From' selection cannot be changed once the Route is created.
- Start Date: The next occurrence of the work order will be created X number of hours, days, weeks, months, or years from the date entered in the Start Date/Start Time field
- Completed Date: The next occurrence of the work order will be created X number of hours, days, weeks, months, or years from the date the previously scheduled work was completed.
- Hide Until Next Occurrence: Hides the route from the calendar until its start date and time has been reached.
- Expire open work orders on the next occurrence: If selected the previous Work Order will be set to Expired status if it was not completed upon creation of the next Work Order, otherwise, the incomplete work will remain as due on the asset.

- Ends:
- Never: The work orders will be generated for infinity
- After a number of occurrences: The work orders will only be generated X number of times.
- On a certain date: The work orders will be generated until a specific date
Note: Work orders will not appear in My Events (calendar) until they are edited and saved.
Work Request Approval
In some cases, field workers can create Work Requests. Some companies prefer that these Work Requests are to be considered ‘Requested’ until they are validated and approved to be assigned.
For example: A field worker sees that a hydrant needs to be painted. They create a Work Request on that hydrant asset and request that it be painted. The supervisor or dispatcher would like to be able to validate and approve that Work Request before it becomes a Work Order.
Specific permissions will provide this functionality. The field worker requires the ‘Can view Workflows’ permission and should not have the 'Can Assign Work Orders’ permission. The supervisor or dispatcher requires the ‘Can Assign Work Orders’ permission.
With these permissions set, the process would be as follows:
1. The field worker creates a Work Request on the asset. Since they do not have permission to assign work orders, the Assignee field is disabled.
2. A Work Request is created with a status of ‘Requested’ for the asset but not assigned.
3. The supervisor or dispatcher performs a search of Work Orders from the Work Orders tile for all Work Orders with a Status of ‘Requested’, reviews the requests and either assigns them or Cancels them.